Windows and MacOS Settings
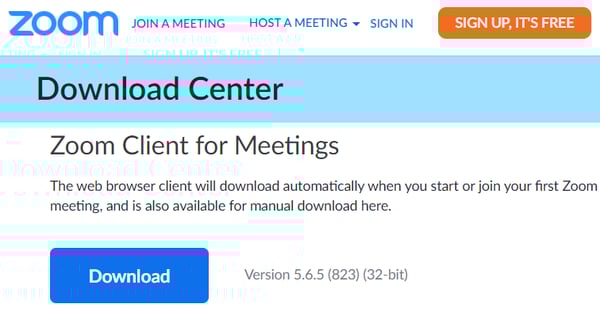
1) To install Zoom for the first time, visit https://zoom.us/download
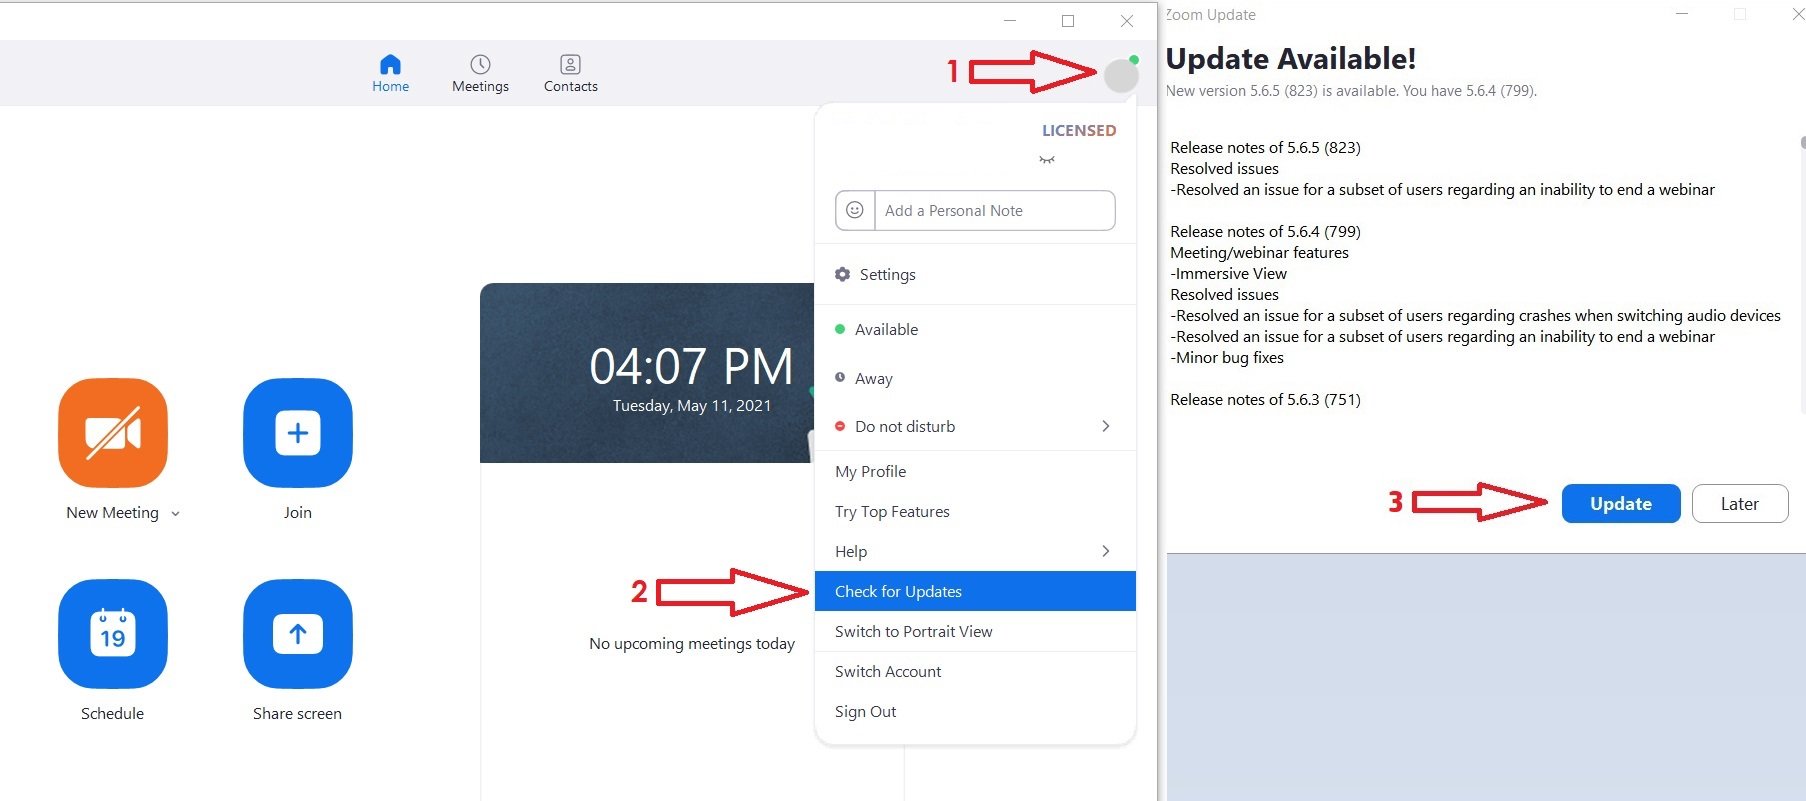
2) If Zoom is already installed, update to TODAY’s version: Click where as shown (1), (2), and (3) in this screenshot. Do this EVERY TIME you start a lesson or performance.
3) Set your Zoom audio settings: Click the ^ next to “Mute” then click “Audio Settings,” then adjust ALL settings shown by the red arrows.
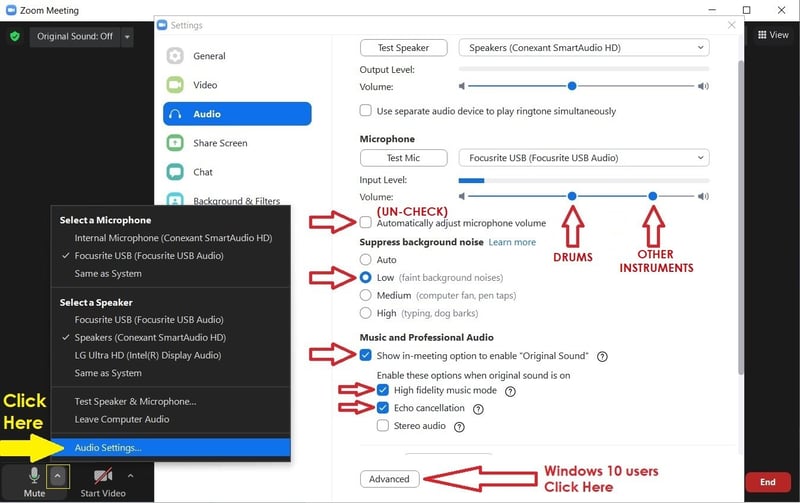
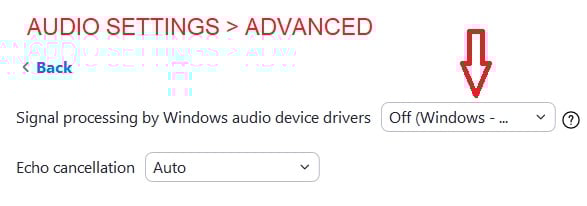
4) If you are using Windows 10, click Advanced (bottom of Audio Settings), then set Signal Processing By Windows to “Off“
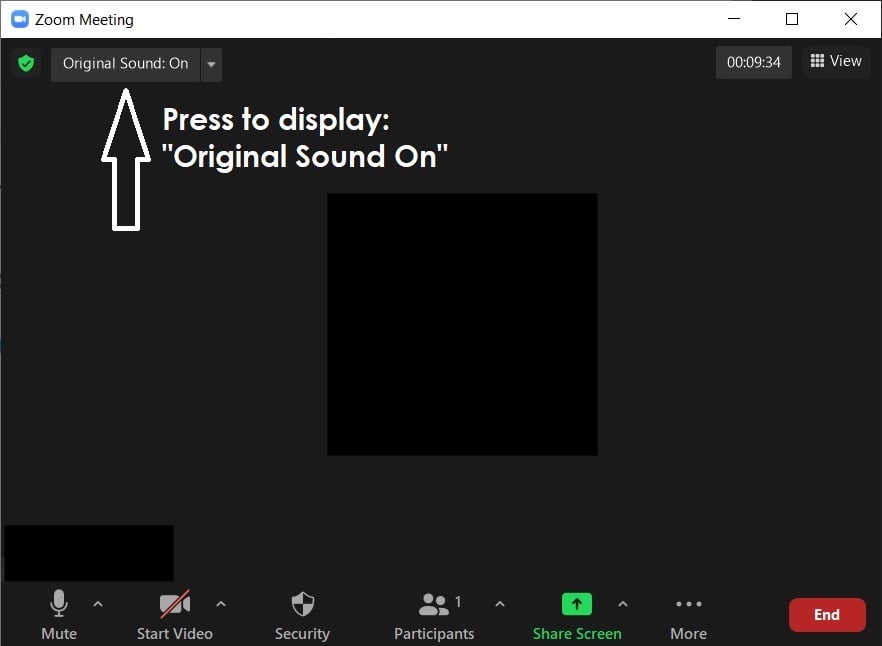
5) Close Audio Settings. On the upper left of the screen, click to turn Original Sound “ON.” Do this EVERY TIME you begin a lesson or performance.
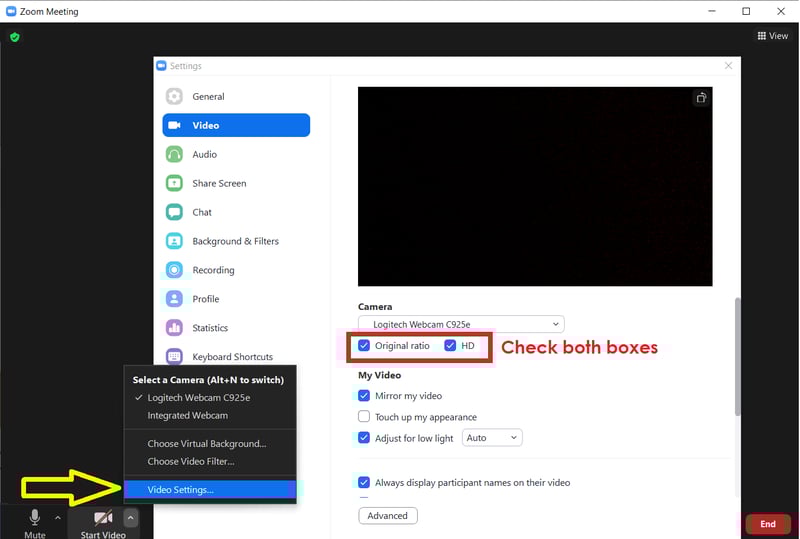
6) Video Settings: Click the ^ next to Start/Stop Video, then check HD and Original Ratio